Please read first and ask questions later, you know the drill.
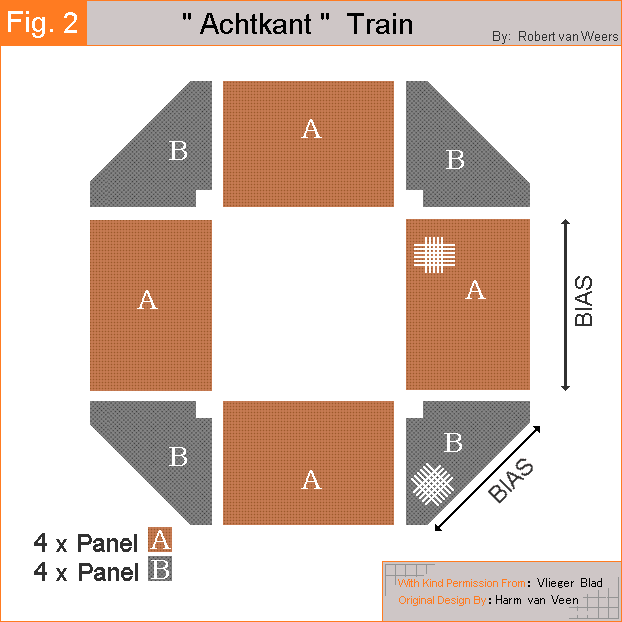
The first diagram, Fig 2, shows the positioning of the panels.
You can also see the bias of the fabric on the different panels.
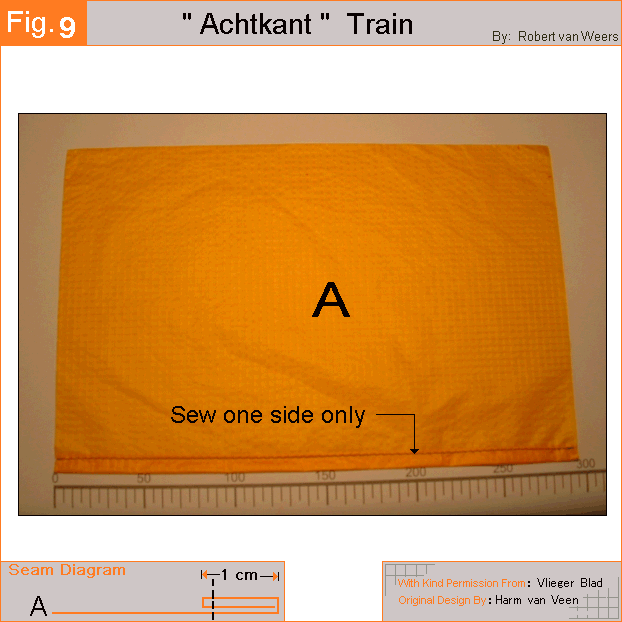
I have inserted Fig 9 to show you. The seam we use is a double rolled hem. You can mark these seams out as shown on the template diagram from the introductory stage with a chalk pencil. That way it all stays nice and strait. Pre fold the fabric once at 1 cm then again at 2 cm, sew using a straight line stitch.
Stitch as close to the seams edge as possible, say 2 mm.
Do this to all 24 of the the A panels at this stage, it get's them out of the way.
Please note that some of the images have a seam diagram at the bottom for clarification.
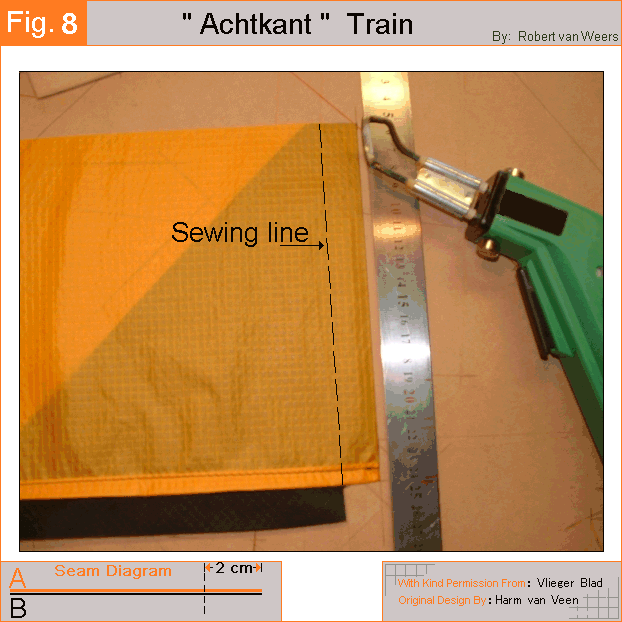
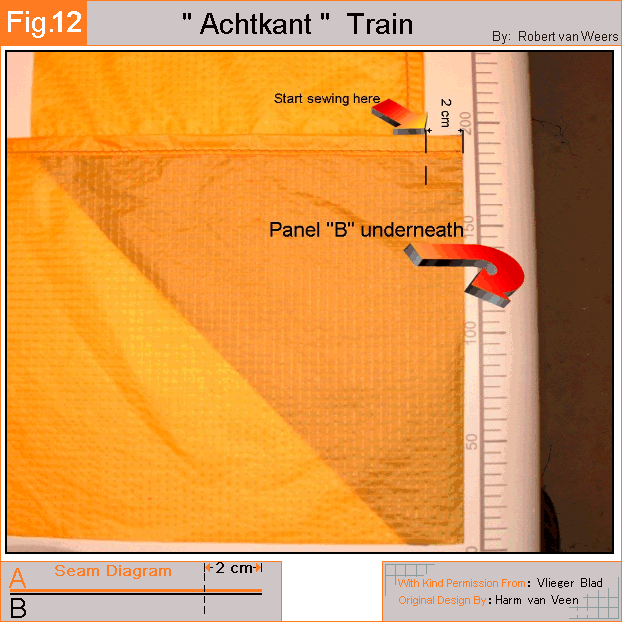
In the above image, Fig 8, you can see panel B underneath. Make sure you line it up as per this image.
The tops are lined up and you should have the 2cm hem allowance of panel B hanging out the bottom.
Also be aware of placing the two right sides together making sure the folded seam will end up on the back of the sail.
The seam of panel A is seen on top in Fig 8.
Proceed to sew them together along the dotted sewing line I have drawn.
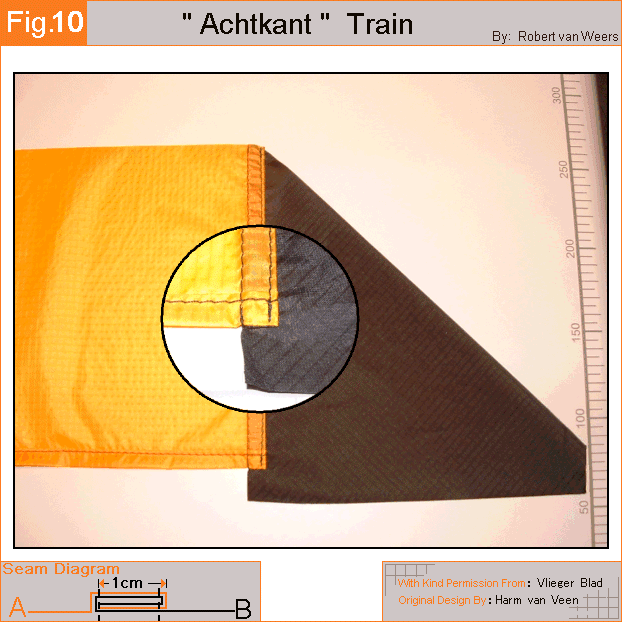
Once you have this done, fold the excess seam allowance twice to create another double folded seam.
Make sure you fold the seam allowance onto panel B. This is also important.
Sew the second seam.
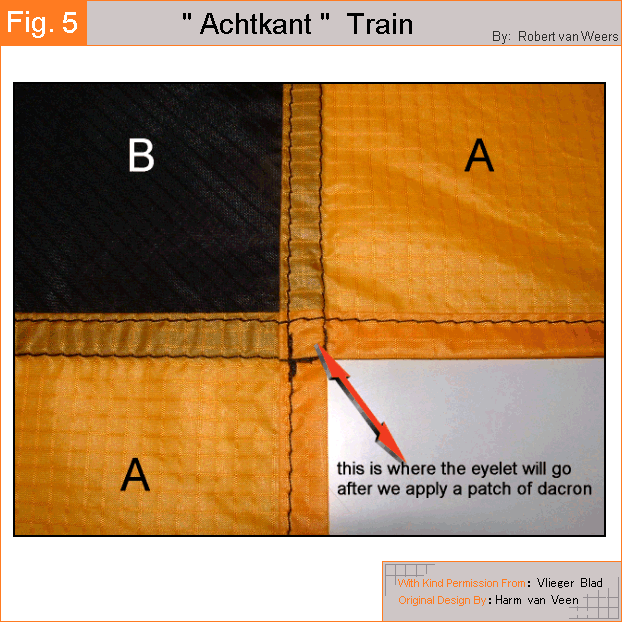
If this step is done correctly, you should end up having it looking like the image in Fig 5 below. Again, we are looking at the back of the kite. When you look at the corner where all three panels meet, you will see that we have created a small square. This has come about by using our 2 cm hem instead of a smaller one and by using a straight stitch rather than a zigzag stitch. This tiny square is where we will be placing a small eyelet for our lines to go through, thus holding them in place. But not before sewing on a small patch of dacron. This is dealt with in the next stage.
Pre folding the fabric around the entire outside edge will be helpful and make this task easier.
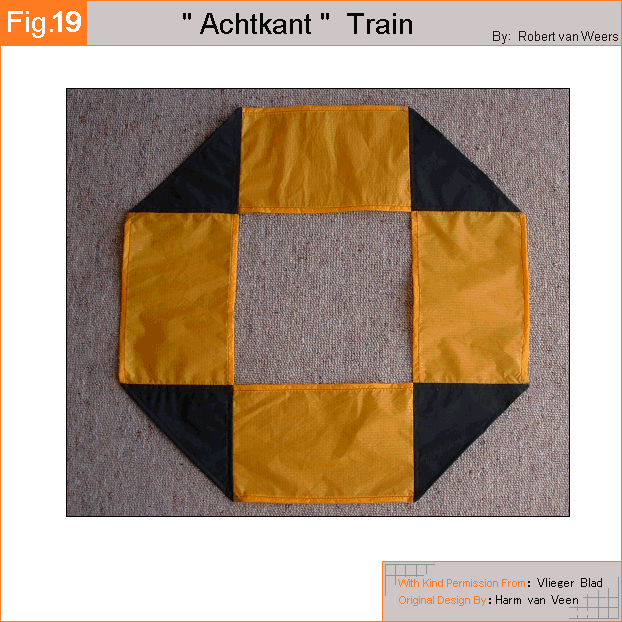
Fig 19 shows where you should be, at the end of this stage.
 Menu
Menu

