DIY Achtkant Train - Stage 3
Reinforcing and Pockets
In this stage we will add all the reinforcing to our sails and make the pockets as well as cutting the spars to fit.Step 1.
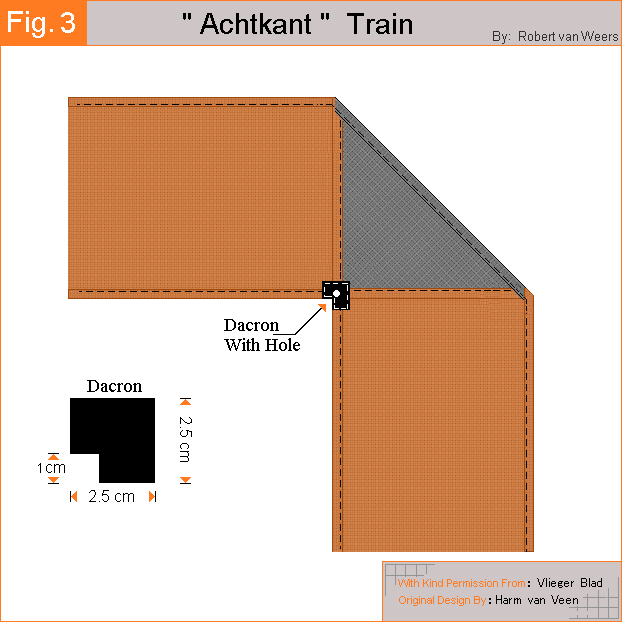
Start by cutting 24 reinforcement squares 2.5cm x 2.5cm from your Dacron, you will need 4 per sail.Remove a small 1cm x 1cm square from one of the corners, see Fig 3 for details.
Sew these squares on to the back of the kite in to the position as seen in Fig 3.
That is right on the corner.
This can be tricky as you have to sew through quite a few layers.
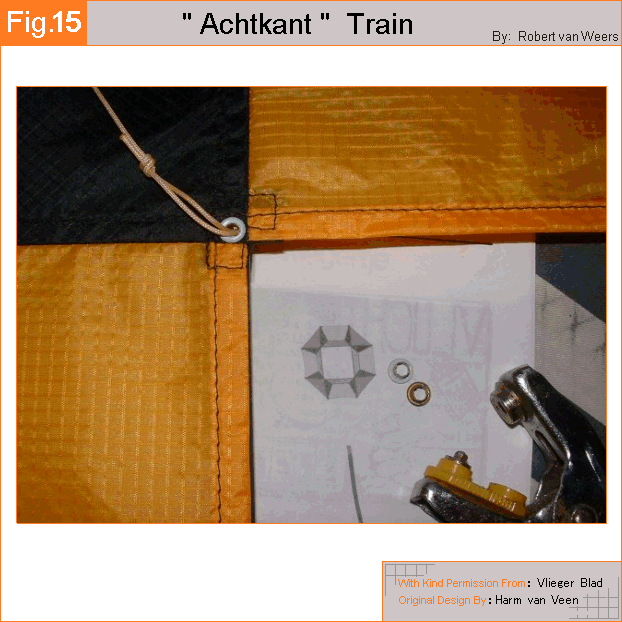
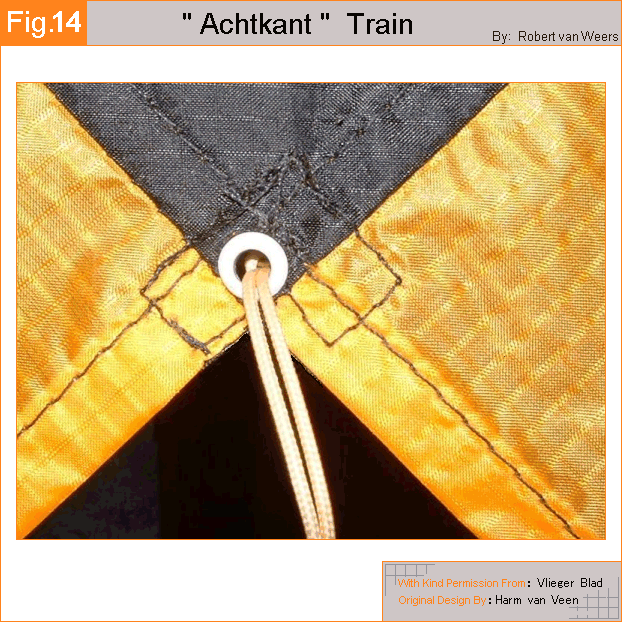
Take a look at the next image to see where the eyelet is placed and just what it's application is. The view is from the front of the kite, so the good side of the eyelet is showing.
Go ahead and apply this step to all your sails. Another close-up of the eyelet is shown below.
Step 2.
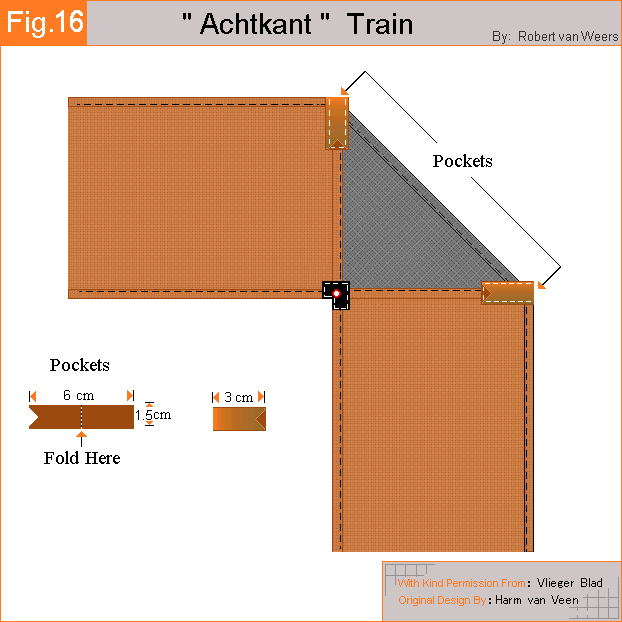
Ok, it's pockets next, you will need 8 per sail.Cut 48 pieces of Dacron 6cm x 1.5cm. Cut a small notch or V in one end and fold in half.
Look at the detail in Fig 16. Sew them into place as per the Fig 16 diagram below.
Line the top of the pocket up with the outside seam making sure the V is on the lower end so it can receive our spars later.
The small notch will aid in keeping our spars centered within the pocket.
Note:
Make sure that the pockets are also centered on the double folded seam.
We want our spars resting right on top of these.
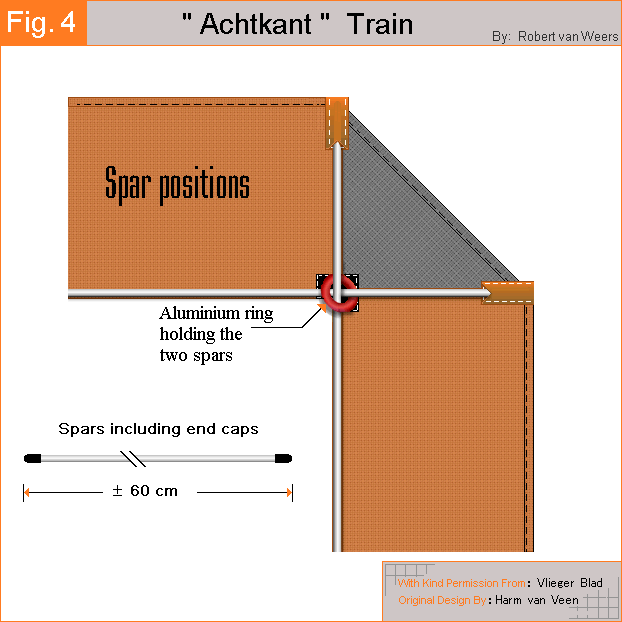
Fig 4 shows this well below here.
Step 3.
With all your pockets and reinforcing now sewn on, that just about takes care of all the sewing for our project, apart from the tails.
So it is time to fit our spars.
I think the best way to do this is to fit one set first, so cut four spars and fit these to one of the sails.Now take those out and see if they fit nicely in all the other sails before cutting the rest of your spars. This saves wastage. Depending on your sewing skills, all the sails should be identical, well in a perfect world anyway. What I am trying to say is that there might be some slight variations, this will become very obvious if you use one set of spars to check against all the other sails. If some of them are too short, sew a line of stitches at the top of the pocket along the outer edge, this will make the pocket somewhat shorter and the spars should fit without too much alterations. Make sure that if you do this procedure, you do it symmetrically. So do the same to the opposite spar pocket.
NOTE:
Just to refresh your memory, the 3mm go in as longerons and the 2mm as spreaders.
In stronger winds, the bottom kite, can be spared with 3 mm all round.
This helps reduce increased flexing in the horizontal plane.
You want some flexing to be present for stability but not excessive.
In Fig 4 you can see the position of the ring that holds the two spars together, we will deal with this in the next stage so no need to place them on just yet.In stronger winds, the bottom kite, can be spared with 3 mm all round.
This helps reduce increased flexing in the horizontal plane.
You want some flexing to be present for stability but not excessive.
 Menu
Menu

