DIY Achtkant Train - Stage 4
Tails and Bridles
The final stages to finish our project is about adding the tails and bridles.
Step 1.
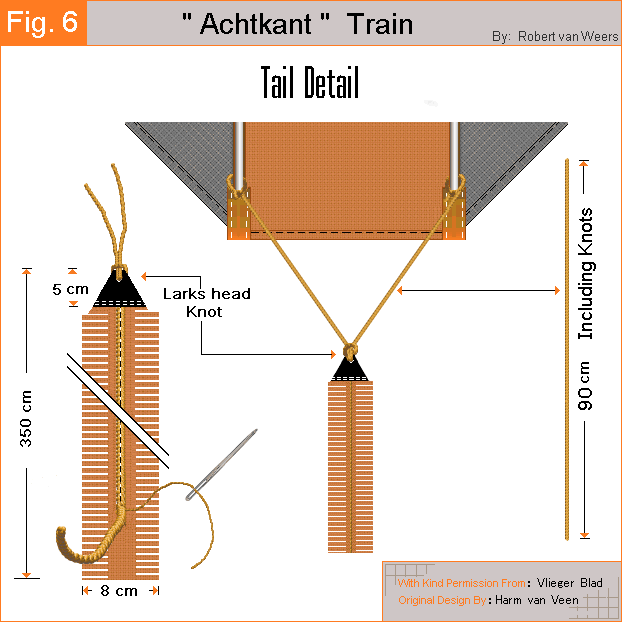
We'll deal with the tails first as this is the least complicated of the two. Start by cutting 6, or 1 per kite if you are making several more, strips of fabric measuring 8 cm x 350 cm.
Note: You can sew several smaller strips together to make up the length, that way you can also add colour to the tails.
When you have cut the strips, take some line, about 75 to 100 pound braking strain, and sew this on along the centerline all the way down the strip.
Fig 6 illustrates this part.
Of course I don't mean for you to do this by hand, the needle is just there to show the technique.
If your machine is having problems with this, increase the top tension and also you may want to try on a piece of scrap first.
Don't worry if it puckers up like mine does, this is not an easy task.
Note:
You can best draw a line on the fabric down the center to help keep this line on track whilst sewing.
The sewn on line is there to prevent the small incisions from ripping through and cutting our tails.
The sewn on line is there to prevent the small incisions from ripping through and cutting our tails.
Note:
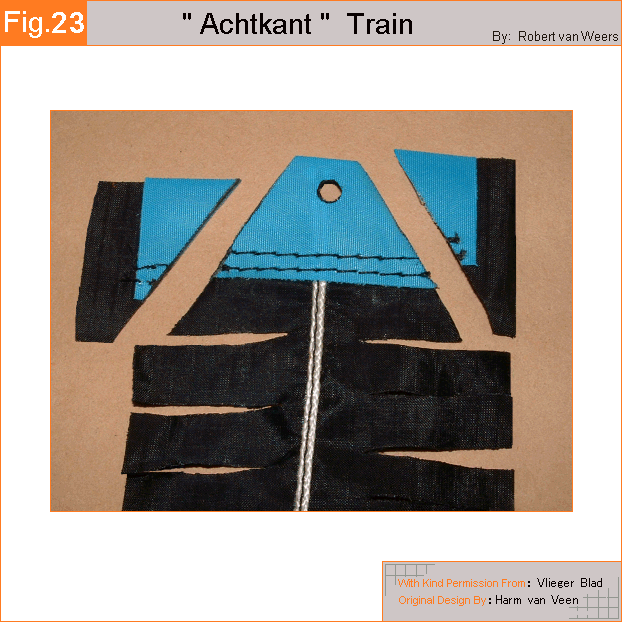
If you look closely at Fig 23, you can see the sewn on line running all the way to the top of the tail under the dacron.
The hole is made just to the right of the sewn on line so as not to weaken it too much.
I have actually clipped it slightly but that is not too bad.
You can make a template for this if you want them all to be exact.
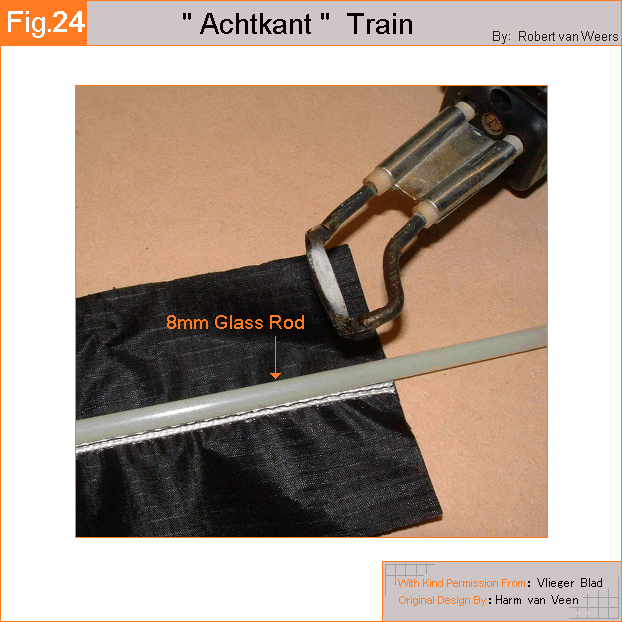
What I do is place an 8mm fiberglass rod up against the sewn on line to prevent the Hot Knife touching this line and just start making the incisions.
They are spaced about 2 cm apart. I do recommend you hot cut this part to stop fraying of the fabric therefor giving them a much longer life span.
See Fig 24 for close up details.
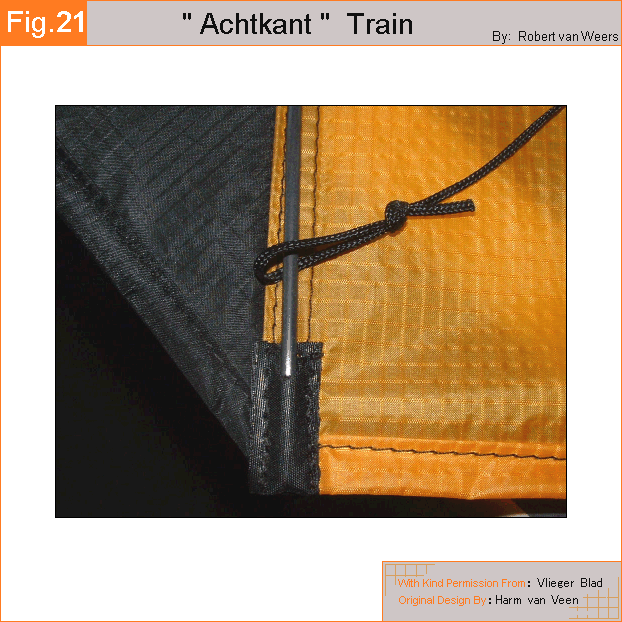
An illustration of all the knots can be seen in step 2. Fig 21 is showing how we actually secure the tails to our kites. We will do this once all the kites have been tied together and bridled.
Step 2.
Bridling
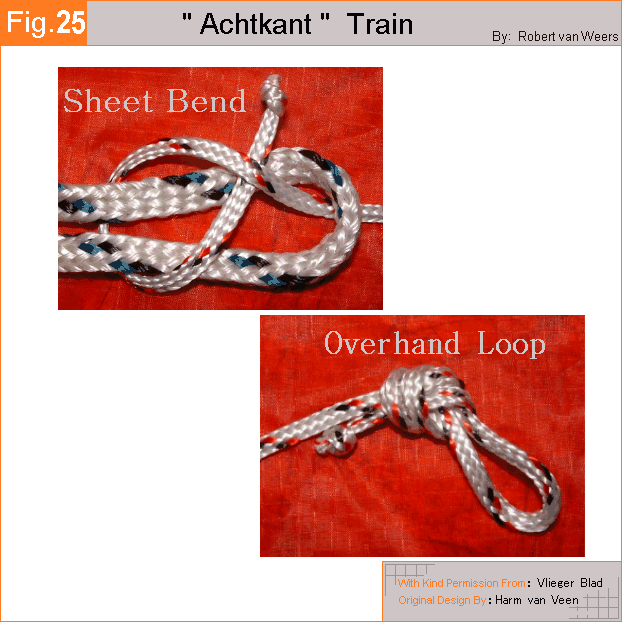
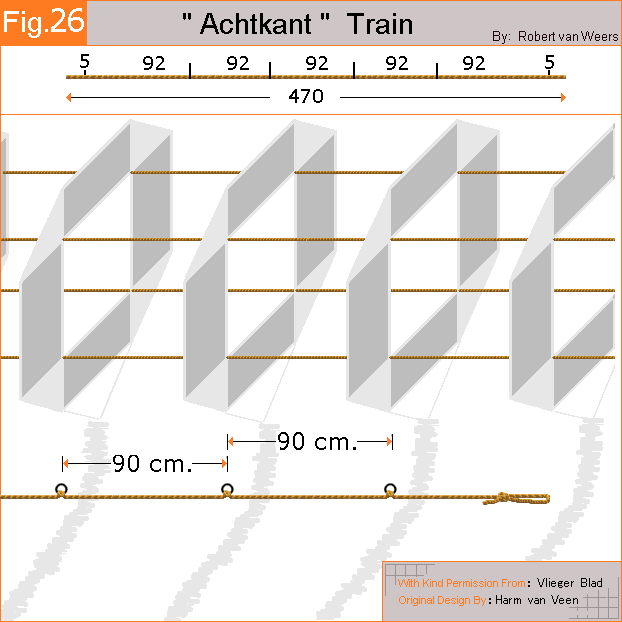
Before we start I would like to illustrate the knots used in this part. So familiarize yourself with these. Most of you don't have a problem with this anyway but nevertheless it is part of this project and I am obliged to show them.Before you tie any knots, you need to feed the lines through the eyelets of the sails. You should have all the marks on the line as in Fig 26 before you do this. Care must be taken here to keep them in the corresponding eyelets. You don't want to get a twist in the lines.
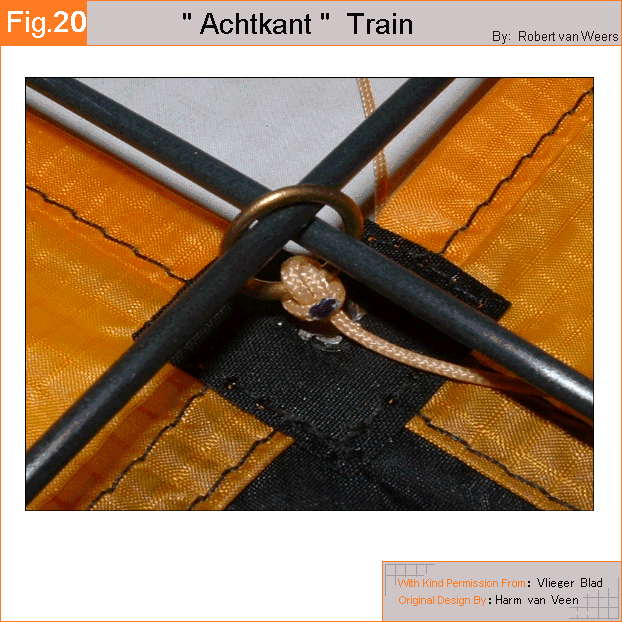
Now place your spars through these rings as in fig 20 to secure the last kite in place. This image shows the back of a kite located somewhere in the center, it will look slightly different because the last kite is an end kite and uses a larks head knot.
Note:
You might have to tie the loop first then poke it through the hole to secure the ring, as the resulting knot might not fit back through the eyelet.
Step 3.
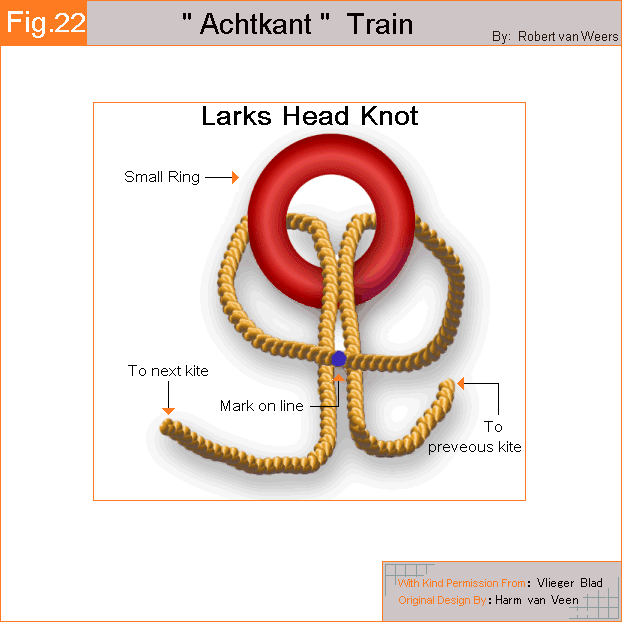
Ok, the next step should be simple and is repeated for the remaining kites bar the first one. Pull the line through the sail of the next kite down, until you come across the next mark at 92 cm. Simply place a ring on using a larks head knot. This is shown proper in fig 20. Make sure all your marks are dead center as seen in fig 20.
Secure the sail to the line using the spars through the eyelet as done in the previous step. Do not secure the first sail to the lines just yet, we need to add the bridle first.
Secondary Bridle
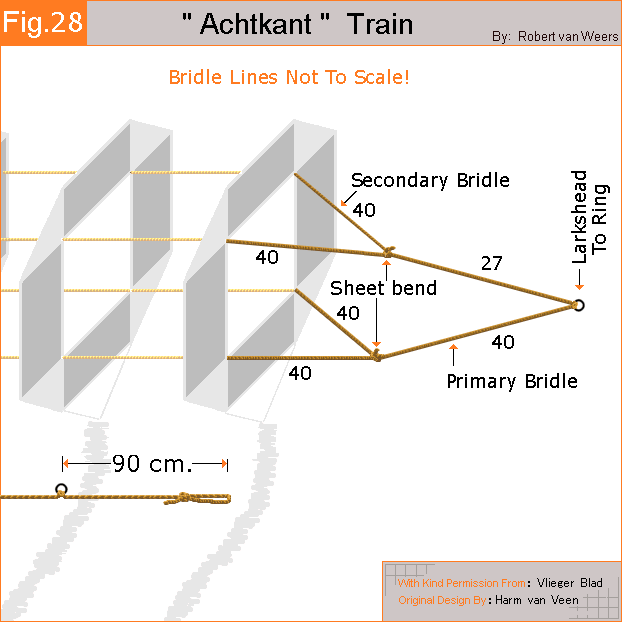
Take two pieces of line for the secondary bridles each 95cm long. 75 pound braking strain is more than enough. Each of these lines should contain 3 overhand loops, one in the center and one on both ends. Make sure they are even.Take one of the lines and feed one end through one of the eyelets from the front of the leading kite and join it up with the loop of the connecting line. Larks head these two loops together on to one of the rings and secure to the sail using the spars. Now repeat for the other three. Please look at Fig 28 below for a bridle diagram.
Primary Bridle
For the primary bridle, take a piece of line 75 cm long, place two overhand knots, not loops, at both ends. Secure these ends to the loops located in the middle of the secondary bridles using a sheet bend. To finish it all off, place a towing ring in the primary bridle line at the point as given in Fig 28. Depending on your line thickness and ring thickness, you might have to make some small adjustments to get the right angle of attack.Go ahead and add the tails and your done.
Launching.
Best done with two people but can be done solo. Either way you will need a long launch, secure one end of your flying line to a stake first, then secure the other end to your kites. Stretch the train all the way out. Hold it up by the last kite, wait for a nice gust and let it go. Make sure the tails are free. Go back to your stake and untie the line, let some line out, secure again, grab a Grolsch and enjoy. In the next stage we will be making a pilot "Achtkant".
 Menu
Menu

